版权所有,禁止匿名转载;禁止商业使用。
初步学习了CoreAnimation框架,总结了几个动画效果,主要是通过CAShapeLayer与贝塞尔曲线实现。先看下效果
1.gif
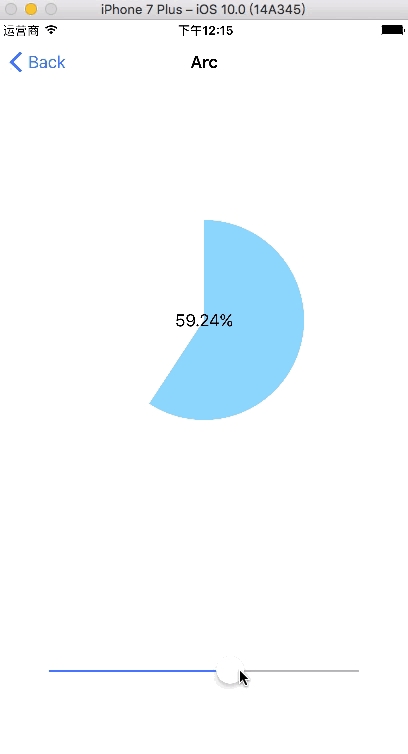
扇形下载进度
要实现扇形的下载进度,有两种方法, 这里先使用第一种:
1.使用设置UIBezierPath的角度
2.使用 CAShapeLayer的stokeEnd属性
//设置中心点
    CGPoint point = CGPointMake(self.frame.size.width/2, self.frame.size.height/2);

    //起点位置
    CGFloat startAngle = - M_PI /2;

    //结束位置
    CGFloat endAngle = self.progress *M_PI *2 + startAngle;


    UIBezierPath *path =[UIBezierPath bezierPathWithArcCenter:point radius:self.bounds.size.width/2 startAngle:startAngle endAngle:endAngle clockwise:1];

     //画一根到 圆心的线
    [path addLineToPoint:point];


    //通过layer绘制
    CAShapeLayer *layer =[CAShapeLayer layer];


    layer.path = path.CGPath;

    layer.fillColor =[UIColor colorWithRed:0.47 green:0.83 blue:0.98 alpha:1].CGColor;

    [self.layer addSublayer:layer];
圆形进度
首先 我们需要一个背景层 一个前景层,一个路径供给两个layer使用。这里我们使用改变stokeEnd 来改变圆弧的进度,代码里增加了一点渐变
   self.backLayer =[CAShapeLayer layer];
    self.backLayer.fillColor  =[UIColor clearColor].CGColor;
    self.backLayer.frame = self.bounds;
    self.backLayer.lineWidth = 4;
    self.backLayer.strokeColor =[UIColor lightGrayColor].CGColor;
    [self.layer addSublayer:self.backLayer];

    self.foreLayer =[CAShapeLayer layer];
    self.foreLayer.fillColor  =[UIColor clearColor].CGColor;
    self.foreLayer.frame = self.bounds;
    self.foreLayer.strokeColor =[UIColor redColor].CGColor;
    self.foreLayer.lineWidth = 4;
    [self.layer addSublayer:self.foreLayer];


    UIBezierPath *path=  [UIBezierPath bezierPathWithArcCenter:CGPointMake(self.bounds.size.width/2, self.bounds.size.height/2) radius:self.bounds.size.width/2-2 startAngle:-M_PI_2 endAngle:M_PI *1.5 clockwise:YES];
    self.backPath = path;

    self.backLayer.path = self.backPath.CGPath;
    self.foreLayer.path = self.backPath.CGPath;
    self.foreLayer.strokeEnd = 0;


    self.gradientLayerLeft =[CAGradientLayer layer];
    self.gradientLayerLeft.frame = self.bounds;

    self.gradientLayerLeft.colors =@[(__bridge id)[UIColor redColor].CGColor,(__bridge id)[UIColor yellowColor].CGColor,(__bridge id)[UIColor blueColor].CGColor];
    self.gradientLayerLeft.locations = @[@0,@0.5,@1];
    self.gradientLayerLeft.startPoint = CGPointMake(0, 0);
    self.gradientLayerLeft.endPoint = CGPointMake(0, 1);
    [self.layer addSublayer:self.gradientLayerLeft];


    //设置mask
    [self.gradientLayerLeft setMask:self.foreLayer];
-(void)setProgressValue:(CGFloat)progressValue
{
    _progressValue = progressValue;
    self.foreLayer.strokeEnd = progressValue;
    self.label.text = [NSString stringWithFormat:@"%.f%%",progressValue *100];
}
一个加载动画
引自:旋转加载动画
可以重点学习下做动画的思路,
//核心代码 在动画开始的时候做一些平移旋转
- (void)animationDidStart:(CAAnimation *)anim{
    [UIView animateWithDuration:0.3 delay:0.1 options:UIViewAnimationOptionCurveEaseOut|UIViewAnimationOptionBeginFromCurrentState animations:^{

        self.ball_1.transform = CGAffineTransformMakeTranslation(-BALL_RADIUS, 0);
        self.ball_1.transform = CGAffineTransformScale(self.ball_1.transform, 0.7, 0.7);

        self.ball_3.transform = CGAffineTransformMakeTranslation(BALL_RADIUS, 0);
        self.ball_3.transform = CGAffineTransformScale(self.ball_3.transform, 0.7, 0.7);


        self.ball_2.transform = CGAffineTransformScale(self.ball_2.transform, 0.7, 0.7);
    } completion:^(BOOL finished) {
        [UIView animateWithDuration:0.3 delay:0.1 options:UIViewAnimationOptionCurveEaseIn  | UIViewAnimationOptionBeginFromCurrentState animations:^{
            self.ball_1.transform = CGAffineTransformIdentity;
            self.ball_3.transform = CGAffineTransformIdentity;
            self.ball_2.transform = CGAffineTransformIdentity;
        } completion:NULL];

    }];
}
使用正余弦做的注水动画
在使用正余弦做注水动画时,先了解下正余弦
/**
 正弦曲线公式可表示为y=Asin(ωx+φ)+k:
 A,振幅,最高和最低的距离
 W,角速度,用于控制周期大小,单位x中的起伏个数
 K,偏距,曲线整体上下偏移量
 φ,初相,左右移动的值

 这个效果主要的思路是添加两条曲线 一条正玄曲线、一条余弦曲线 然后在曲线下添加深浅不同的背景颜色,从而达到波浪显示的效果
 */
我们要做的 就是使用两条正余弦,但是这两条正余弦, 波峰需要对应波谷,有两种方法:
- 使用for循环分别拼接正余弦的路径
-(void)updateWave
{
    //波浪宽度
    CGFloat waterWaveWidth = self.bounds.size.width;
    //初始化运动路径
    CGMutablePathRef path = CGPathCreateMutable();

    CGMutablePathRef maskPath = CGPathCreateMutable();
    //设置起始位置
    CGPathMoveToPoint(path, nil, 0, _waveY);

    //设置起始位置
    CGPathMoveToPoint(maskPath, nil, 0, _waveY);
    //初始化波浪其实Y为偏距
    CGFloat y = _waveY;

    //正弦曲线公式为: y=Asin(ωx+φ)+k;
    for (float x = 0.0f; x <= waterWaveWidth ; x++) {
        y = _waveAmplitude * sin(_wavePalstance * x + _waveX) + _waveY;

        CGPathAddLineToPoint(path, nil, x, y);

    }
    for (float x = 0.0f; x <= waterWaveWidth ; x++) {
        y = _waveAmplitude * cos(_wavePalstance * x + _waveX) + _waveY;

        CGPathAddLineToPoint(maskPath, nil, x, y);
    }
    [self updateLayer:_waveLayer1 path:path];
    [self updateLayer:_waveLayer2 path:maskPath];

}
-(void)updateLayer:(CAShapeLayer *)layer path:(CGMutablePathRef )path
{
    //填充底部颜色
    CGFloat waterWaveWidth = self.bounds.size.width;
    CGPathAddLineToPoint(path, nil, waterWaveWidth, self.bounds.size.height);
    CGPathAddLineToPoint(path, nil, 0, self.bounds.size.height);
    CGPathCloseSubpath(path);
    layer.path = path;
     CGPathRelease(path);
}
2.使用单个for循环只是 设置 另一条曲线的y值相反即可实现两条正余弦的效果 ,最后一个动画中会有说明
for (int x = 0; x<WIDTH; x++) {
        y = waveHeight*sinf(0.01*waveCurvature*x+offSetValue*0.045);
        CGPathAddLineToPoint(path, nil, x, y);
        //遮罩层的路径与之相反
        masky = -y;
        CGPathAddLineToPoint(maskPath, nil, x, masky);
    }
但是我们有个需求就是改变 波浪的高度, 实现注水的百分比,就需要设置波浪的偏距
-(void)updateWaveY
{
    CGFloat targetY = self.bounds.size.height - _progress * self.bounds.size.height;
    if (_waveY < targetY) {
        _waveY += 2;
    }
    if (_waveY > targetY ) {
        _waveY -= 2;
    }
}
正余弦动画2
如果有个需求 ,比如一个小船 随着波浪的波动而起伏
那我们就需要计算 波浪的位置,然后设置小船的frame
//这里使用创建正余弦的第二种方法
    for (int x = 0; x<WIDTH; x++) {
        y = waveHeight*sinf(0.01*waveCurvature*x+offSetValue*0.045);
        CGPathAddLineToPoint(path, nil, x, y);
        //遮罩层的路径与之相反
        masky = -y;
        CGPathAddLineToPoint(maskPath, nil, x, masky);
    }
计算出实浪波动时,最中间的位置,设置小船的frame
  CGFloat CentY = waveHeight*sinf(0.01*waveCurvature*WIDTH/2+offSetValue*0.045);
    CGRect boardViewFrame = [boardView frame];
    boardViewFrame.origin.y = 100-waveHeight+CentY;
    boardView.frame = boardViewFrame;
来自:https://github.com/liuxinixn/ProgressViewDemo